Deploy JBoss EAP Application with S2I
Overview
Source-to-Image (S2I) is a framework that makes it easy to build images starting from your source code. In reality S2I can start from your source code, a file (usually a binary), a bunch of files or a Dockerfile.
Here we’re going to concentrate on the first strategy, building our application image starting from the code in a git repository.
| The main advantages of using S2I for building images are the ease of use for developers and being a repeatable process. |
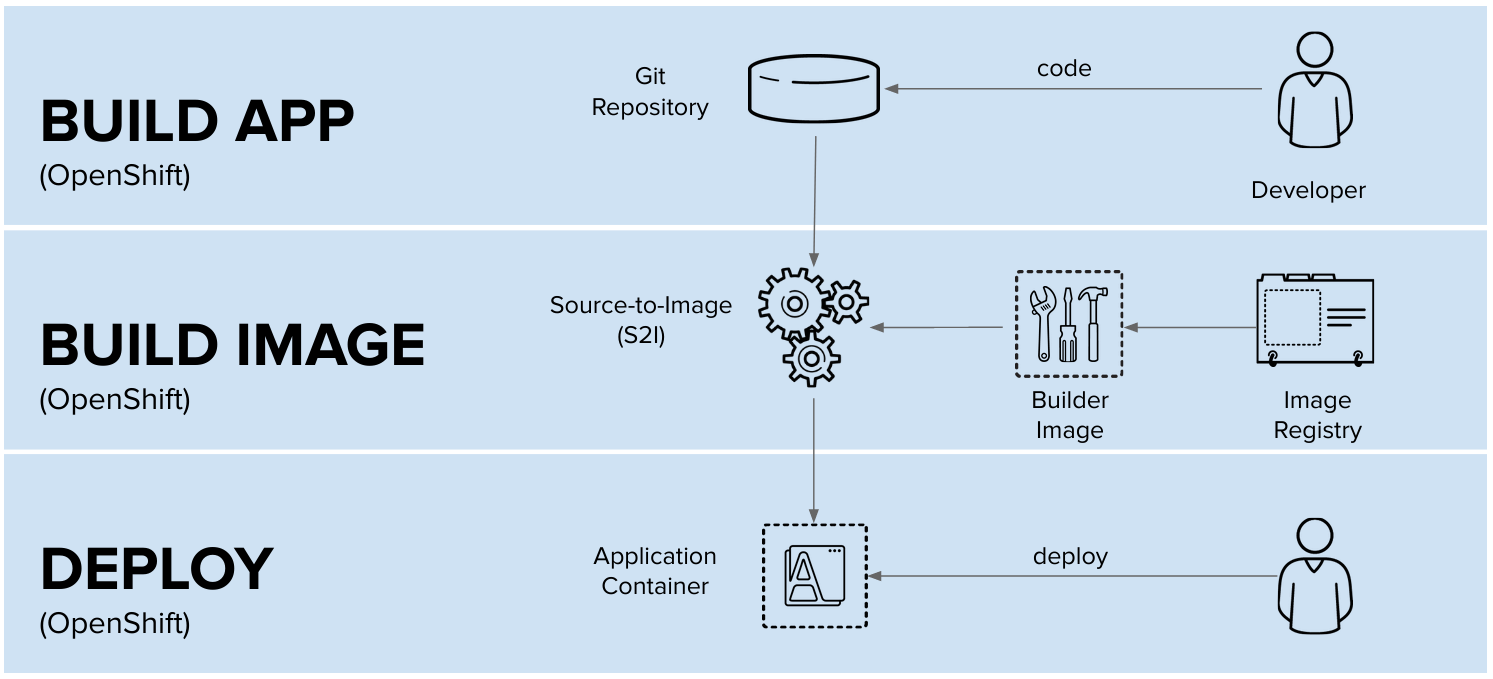
But How Does It Work?
Well as you can see in the previous image building an image that runs your code comprises three phases:
-
Build App: Compiling code, this is language specific and can imply downloading dependencies, compiling, linking, etc. All the tools needed should be present at the builder image. The output of this phase is a binary file or a jar, along with libraries if necessary, etc.
-
Build Image: In this phase we put the output of the previous phase in a known location inside the image so that it can be run later as a container. The output of this phase is an image based on the builder image or a specific image with the minimum required components for running and your application.
-
Deploy: Finally we need to deploy our image to a kubernetes cluster and this means referring to our application image from a Deployment, DeploymentConfig, StatefulSet, DaemonSet, Job, etc.
Let’s go a bit deeper with the explanation, in order to build your application you will need a builder image designed according to the S2I framework. In general, you will use a supported image by Red Hat, it can be for Java, Python, .Net, etc. go here but if you need or want to create your own builder image you can go here to learn all you need to do it.
In a nutshell a builder image is an image that includes:
-
All the tools you need to compile, download dependencies, etc. for a given programming language.
-
Source-to-image scripts: You can write source-to-image (S2I) scripts in any programming language, as long as the scripts are executable inside the builder image. S2I supports multiple options providing
assemble/run/save-artifactsscripts.
The two most important scripts are assemble and run:
-
assemble→ The assemble script builds the application artifacts from a source and places them into appropriate directories inside the image. This script is required. -
run→ The run script executes your application. This script is required.
Being More Specific
Ok, for now the explanation applies to any language/framework, but this lab has to do with a specific language, Java, and a specific runtime to deploy it on, JBoss EAP, so let’s go a bit deeper.
First, you will be using a specific builder image for JBoss EAP instead of the plain Java builder image. This image contains maven, JDK and JBoss EAP 7.2 Specifically in this lab you will use this image:
registry.redhat.io/jboss-eap-7/eap72-openshift:latest
Second, the assemble and run scripts are there to help you avoiding substituting the standalone.xml file that comes with the image. Don’t take this wrong, you still can substitute it but it’s usually a better practice to adapt the file during the assemble and run stages using well defined procedures.
| Using the procedures explained in this guide there are more chances that you will build the image for your application across minor upgrades of JBoss EAP without making any changes to the configuration of S2I. |
Assemble Script
In short, the assemble script:
-
Compiles and generates a
WAR/JAR/EARfile usingmaven -
Copies the output of the previous step to the JBoss deployments path (/deployments)
-
Checks if
CUSTOM_INSTALL_DIRECTORIESenvironment variable has been defined. The content of this environment variable should be a list of source directories. -
If
CUSTOM_INSTALL_DIRECTORIESis defined, then for each of those directories look for a file calledinstall.sh-
If there is an
install.shscript executes it -
Else the following artifact directories will be copied to their respective destinations in the built image:
-
modules/* copied to $JBOSS_HOME/modules/system/layers/openshift
-
configuration/* copied to $JBOSS_HOME/standalone/configuration
-
deployments/* copied to $JBOSS_HOME/standalone/deployments
-
-
Here you are an install.sh script example:
#!/bin/bash

injected_dir=$1
source /usr/local/s2i/install-common.sh
install_deployments ${injected_dir}/injected-deployments.war
install_modules ${injected_dir}/modules
configure_drivers ${injected_dir}/drivers.env
In our guide you can find an install.sh script at extensions/install.sh. Have a look to the contents below.
#!/bin/bash
echo ">>>>>>> Running install.sh <<<<<<"
echo ${injected_dir}
if [ "${SCRIPT_DEBUG}" = "true" ] ; then
    set -x
    echo "Script debugging is enabled, allowing bash commands and their arguments to be printed as they are executed"
fi

injected_dir=$1
source /usr/local/s2i/install-common.sh (1)
configure_drivers ${injected_dir}/driver-oracle.env (2)
# configure_drivers ${injected_dir}/driver-postgresql.env (3)

# copy any needed files into the target build.
cp -rf ${injected_dir} $JBOSS_HOME/extensions (4)| 1 | Load functions like configure_drivers, install_deployments or install_modules. |
| 2 | Install Oracle driver which is not installed by default. It’s not used in this guide but as an example variation. |
| 3 | In JBoss EAP 7.2 PostgreSQL driver is already installed but this is not the case in JBOSS EAP 7.4 as you will see in the upcoming chapter about upgrading JBoss. |
| 4 | Our extensions folder is installed by copying it to $JBOSS_HOME/extensions. |
Run Script
Once at runtime, the run script comes into play and it will look for execution hooks which are executed, if available, from $JBOSS_HOME/bin/launch/configure.sh.
Configuration occurs over three basic phases: preConfigure, configure and postConfigure.
-
preConfigure: invoked before any configuration takes place. Use this to manipulate the environment prior to configuration.
-
configure: invoked to configure based on the execution environment.
-
postConfigure: invoked after all configuration has been completed.
In addition to the execution environment, users may specify additional configuration details through environment scripts specified through the ENV_FILES variable. The processing of env files is similar to the process for the execution environment, with the addition of a prepareEnv method, which is used to clean the environment before processing the env contributed by a file. This is to help ensure that duplicate configurations are not created when processing env files.
In our guide you can find a postConfigure script at extensions/postconfigure.sh. You can also find the content the file copied below.
postconfigure.sh executes the extensions/setup.cli JBoss CLI script to set the JBoss up for kitchensink
|
#!/usr/bin/env bash
echo ">>>>>> Executing postconfigure.sh <<<<<<<"

if [ "${SCRIPT_DEBUG}" = "true" ] ; then
    set -x
    echo "Script debugging is enabled, allowing bash commands and their arguments to be printed as they are executed"
fi

echo ">>>>>> Executing setup.cli <<<<<<<"
$JBOSS_HOME/bin/jboss-cli.sh --file=$JBOSS_HOME/extensions/setup.cli (1)| 1 | You can find this script below |
Let’s have a look to the extensions/setup.cli script.
embed-server --std-out=echo --server-config=standalone-openshift.xml (1)

/subsystem=datasources/data-source=kitchensink:add( \ (2)
  jndi-name="java:jboss/jdbc/kitchensink", \
  connection-url="jdbc:postgresql://${env.DB_HOST}:${env.DB_PORT:5432}/${env.DB_NAME:kitchensink}", \ (3)
  driver-name=postgresql, \ (4)
  user-name=${env.DB_USERNAME},password=${env.DB_PASSWORD}, \ (5)
  validate-on-match=true, \
  valid-connection-checker-class-name="org.jboss.jca.adapters.jdbc.extensions.postgres.PostgreSQLValidConnectionChecker",exception-sorter-class-name="org.jboss.jca.adapters.jdbc.extensions.postgres.PostgreSQLExceptionSorter" \
)

if (outcome == success) of /subsystem=datasources/jdbc-driver=mysql:read-attribute(name=driver-name)
    # Remove Driver
    /subsystem=datasources/jdbc-driver=mysql:remove
end-if

quit| 1 | Script runs on an embed server and results are applied to standalone-openshift.xml |
| 2 | Adding a new data source |
| 3 | Connection string |
| 4 | Driver |
| 5 | Credentials |
You can find more information about building images for JBoss EAP using S2I here.
Let’s get started
Everything we do in this section requires that you have fulfilled the prerequisites section and you’re logged in your OpenShift cluster.
|
Log in as normal user, not as a cluster admin. |
So if not already logged in, please do it now.
|
If you’re using |
oc login -u %USERNAME% -p %PASSWORD% --server=https://api.%BASE_SUBDOMAIN%:6443Deploying a JBOSS EAP 7.2 application manually
Once BuildConfigs are pointing to the right repo we can go on.
Let’s deploy the Kitchensink manually using S2I!
|
This template deploys our application using a |
-
First of all, create the project that will host the application:
oc new-project s2i-%USERNAME%Please open the next link to watch the progress of the chapter.
https://console-openshift-console.apps.%BASE_SUBDOMAIN%/topology/ns/s2i-%USERNAME%?view=graph -
Deploy the PostgreSQL database for the kitchensink app:
oc new-app --name=kitchensink-db \
 -e POSTGRESQL_USER=luke \
 -e POSTGRESQL_PASSWORD=secret \
 -e POSTGRESQL_DATABASE=kitchensink centos/postgresql-10-centos7 \
 --as-deployment-config=false

oc label deployment/kitchensink-db app.kubernetes.io/part-of=kitchensink-app --overwrite=true && \
oc label deployment/kitchensink-db app.openshift.io/runtime=postgresql --overwrite=true
The
oc labelcommands adds decoration to our deployment (used for the Topology view):-
app.openshift.io/runtime: Icon displayed in the node -
app.kubernetes.io/part-of: App grouping
-
-
Deploy the kitchensink app:
Run oc get template -n openshift | grep eapto find other JBoss EAP related templatesoc new-app --template=eap72-basic-s2i \ -p APPLICATION_NAME=kitchensink \ -p MAVEN_ARGS_APPEND="-Dcom.redhat.xpaas.repo.jbossorg" \ -p SOURCE_REPOSITORY_URL="https://repository-gitea-system.apps.%BASE_SUBDOMAIN%/%USERNAME%/kitchensink" \ -p SOURCE_REPOSITORY_REF=main \ -p CONTEXT_DIR=. && \ oc rollout pause dc/kitchensinkIn order to deploy the Kitchensink app, we use a template,
eap72-basic-s2i.A template describes a set of objects that can be parameterized and processed to produce a list of objects for creation by OpenShift Container Platform. A template can be processed to create anything you have permission to create within a project, for example services, build configurations, and deployment configurations. A template can also define a set of labels to apply to every object defined in the template.
You can create a list of objects from a template using the CLI or, if a template has been uploaded to your project or the global template library, using the web console.
-
Adjust the context of the application and add decoration (labels and annotation):
oc set env dc/kitchensink DB_HOST=kitchensink-db DB_PORT=5432 DB_NAME=kitchensink DB_USERNAME=luke DB_PASSWORD=secret && \
oc set probe dc/kitchensink --readiness --initial-delay-seconds=70 --failure-threshold=15 --period-seconds=5 && \
oc set probe dc/kitchensink --liveness --initial-delay-seconds=70 --failure-threshold=15 --period-seconds=5 && \
oc rollout resume dc/kitchensink

oc label dc/kitchensink app.kubernetes.io/part-of=kitchensink-app --overwrite=true && \
oc label dc/kitchensink app.openshift.io/runtime=jboss --overwrite=true

oc annotate dc/kitchensink \
 app.openshift.io/connects-to='[{"apiVersion":"apps/v1","kind":"Deployment","name":"kitchensink-db"}]' \
 --overwrite=true
The
app.openshift.io/connects-toannotation is used to connect the nodes.
Checking BuildConfig
Open the next link and click on the in progress icon to see the log of the building process.
https://console-openshift-console.apps.%BASE_SUBDOMAIN%/topology/ns/s2i-%USERNAME%?view=graph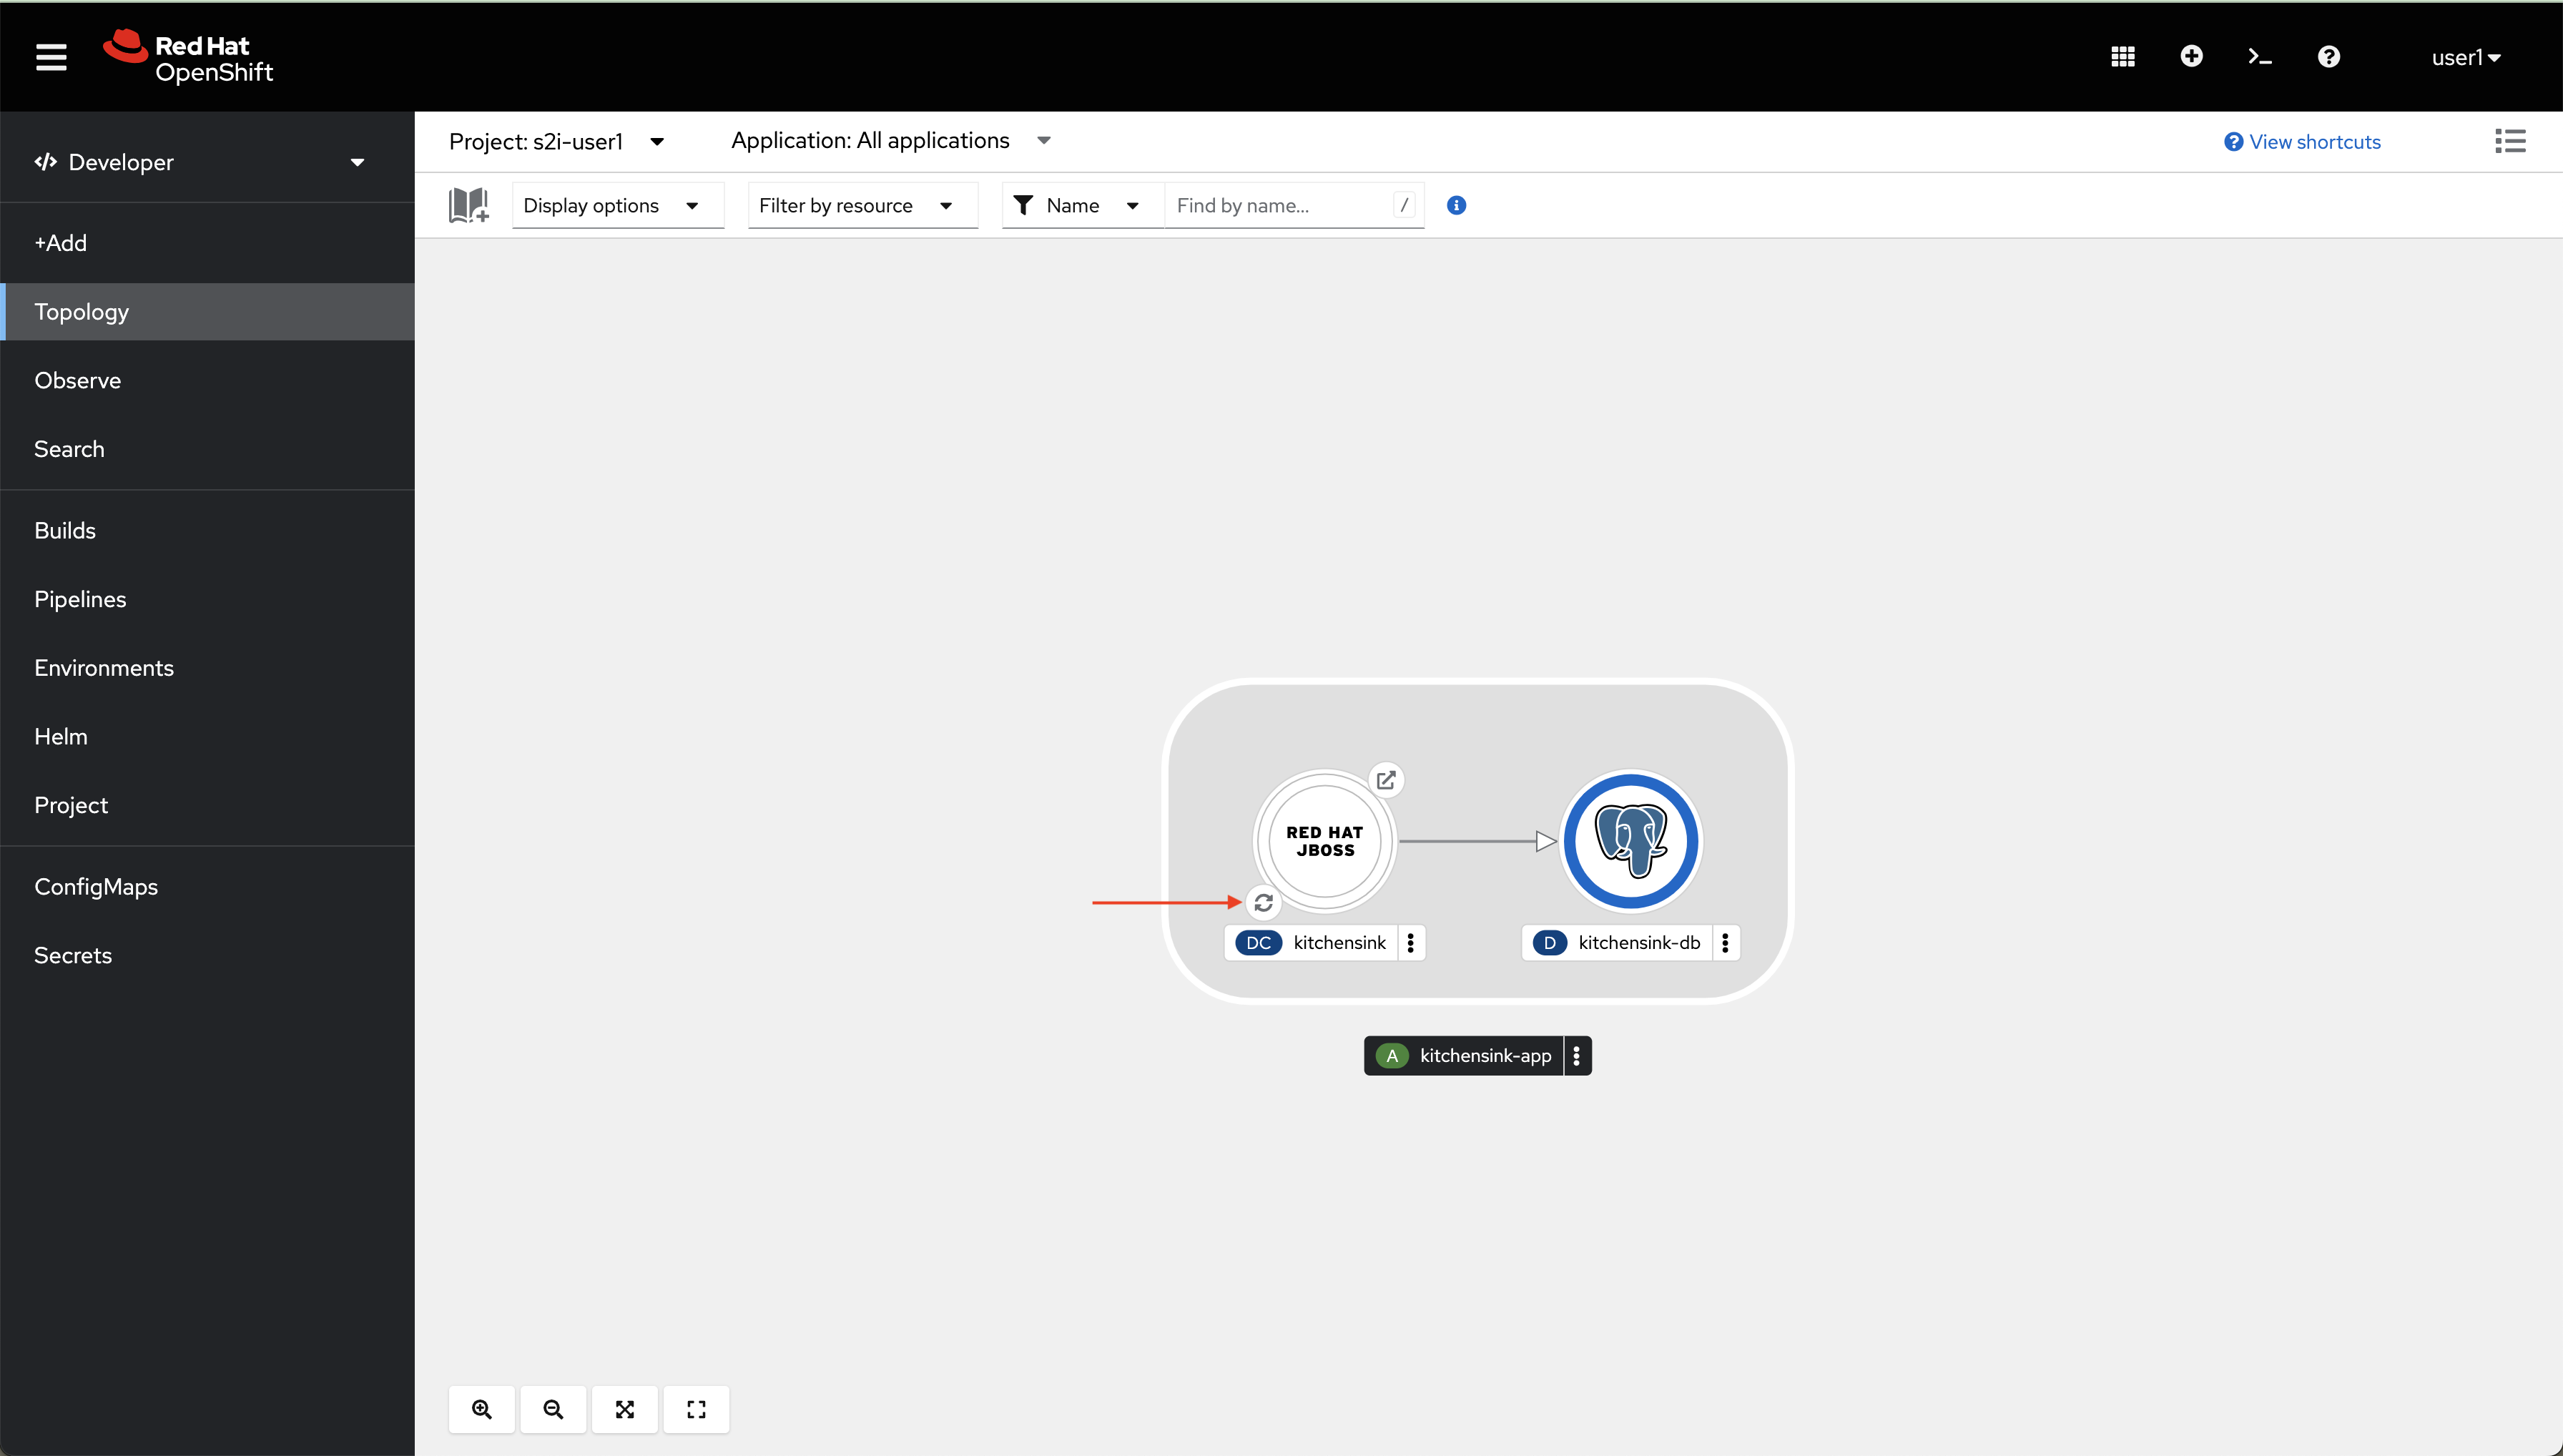
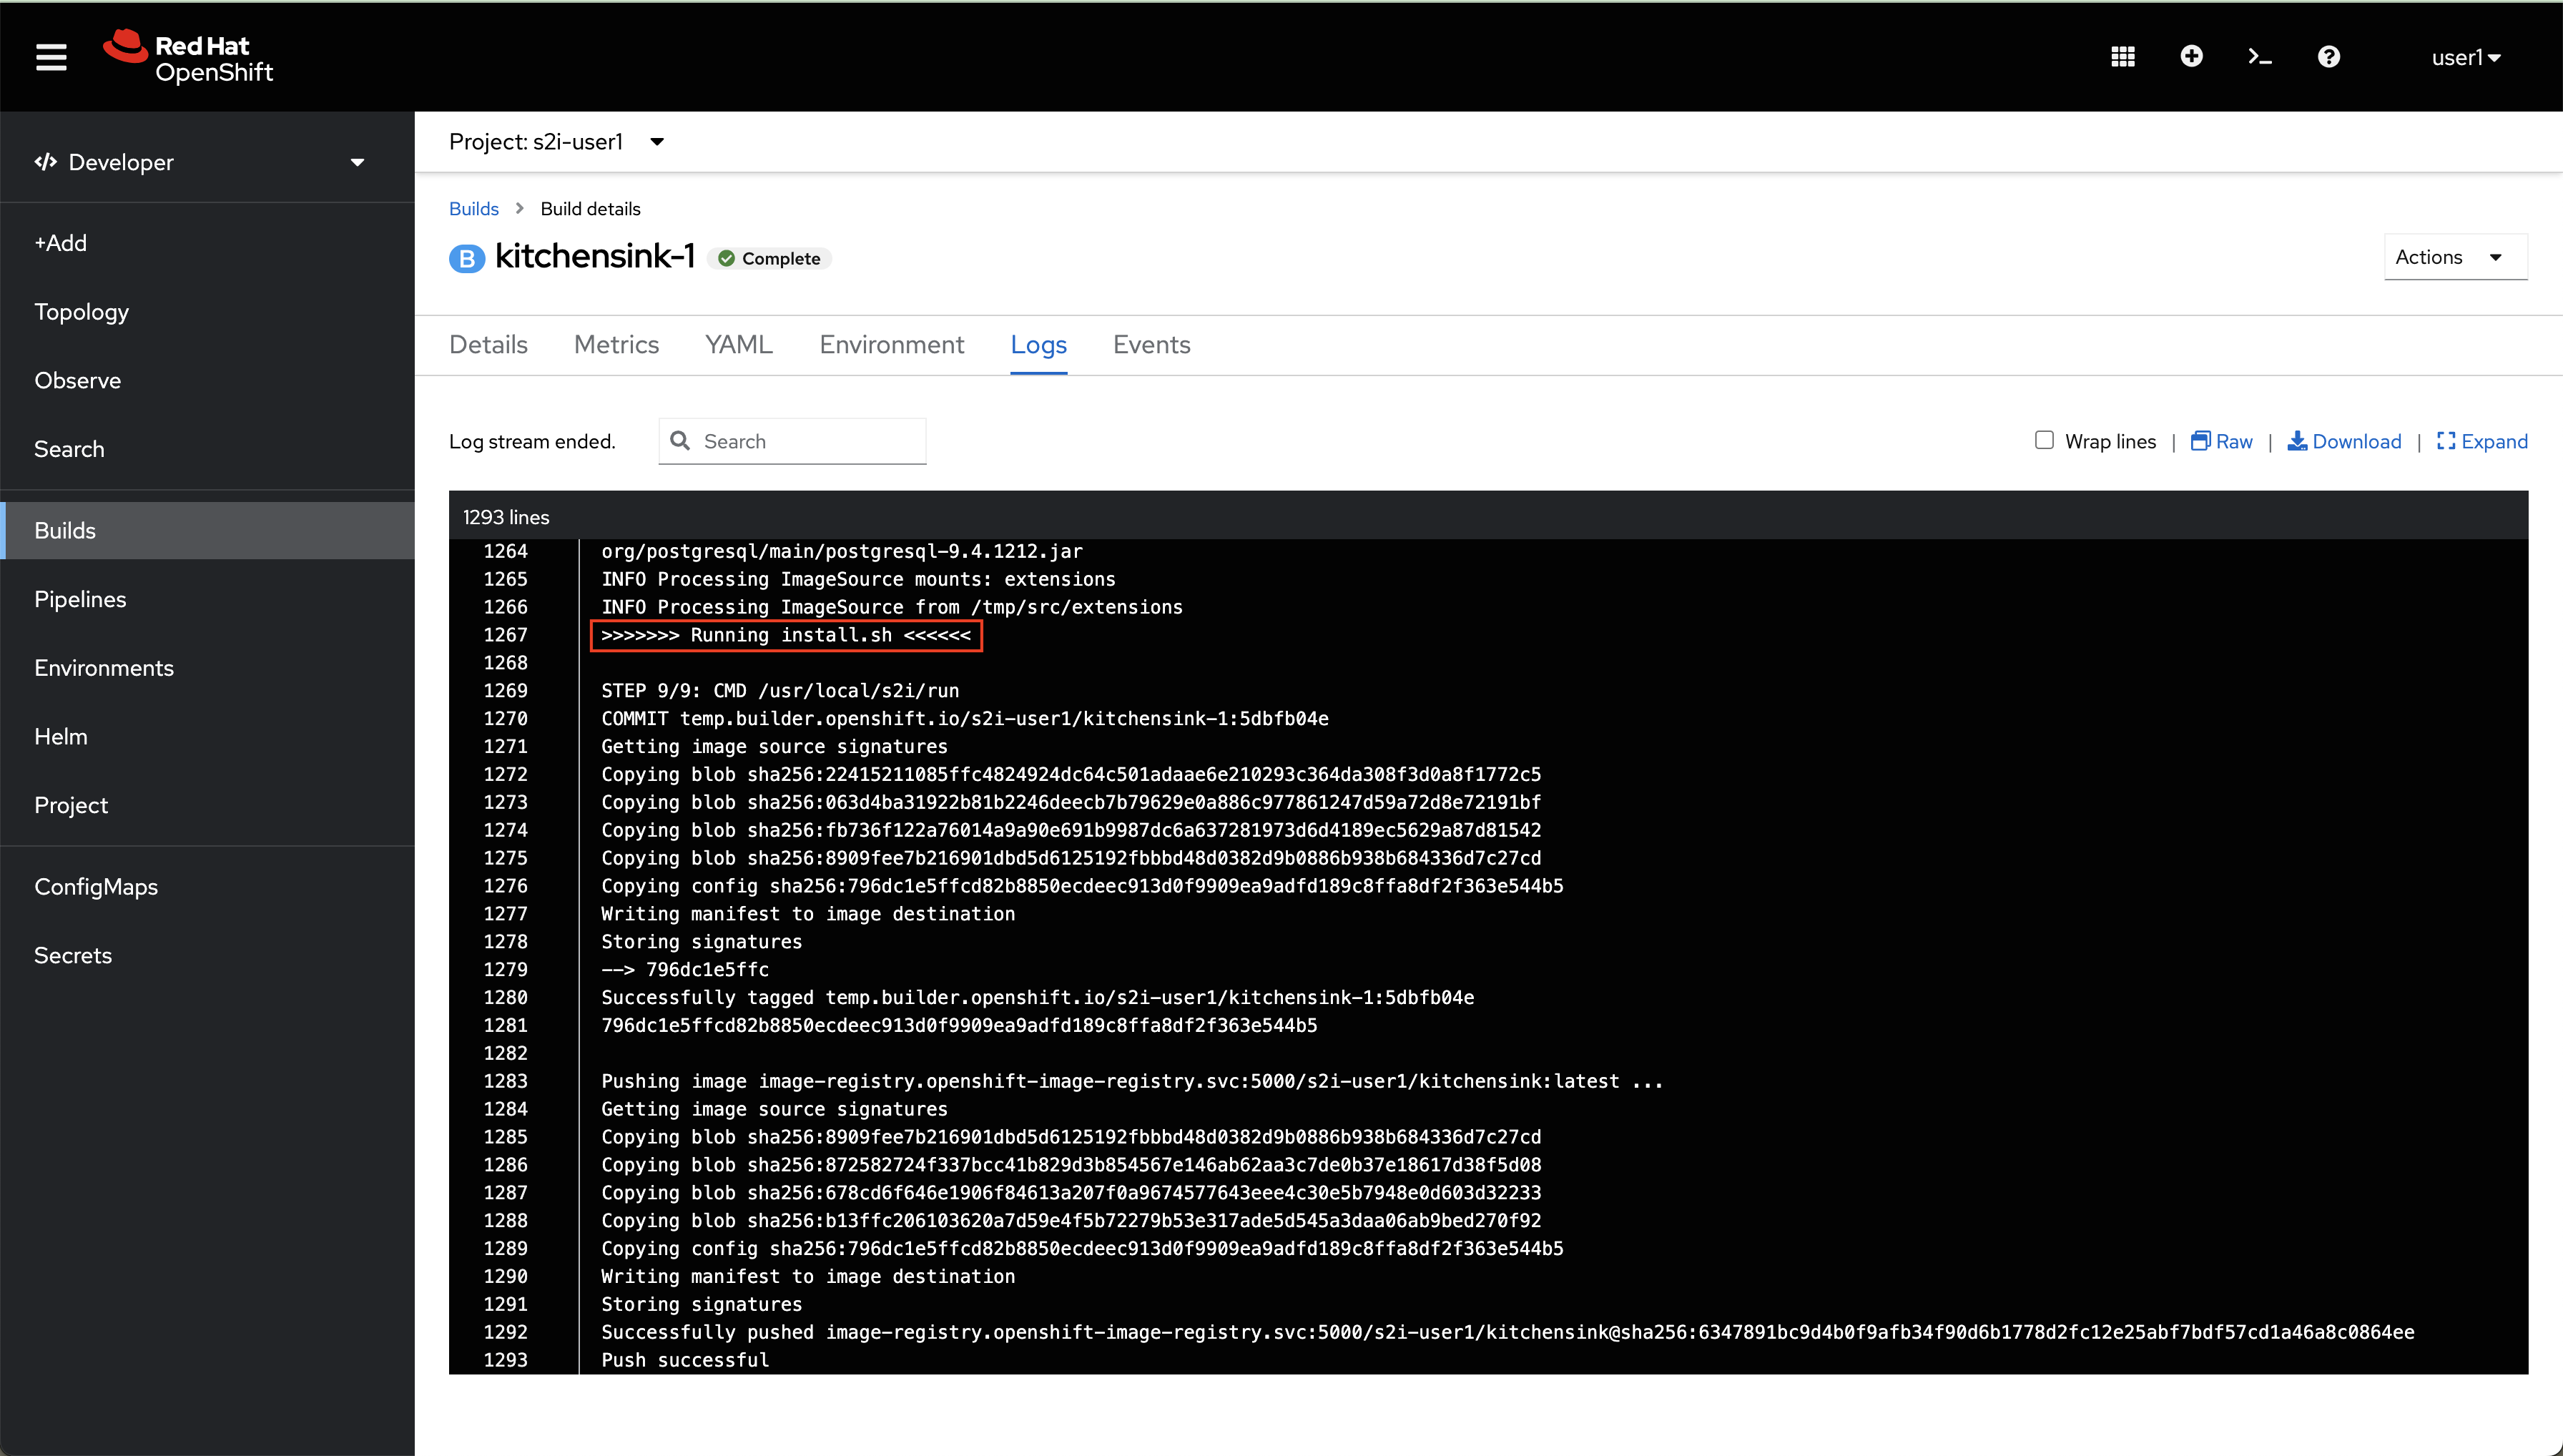
Eventually you will see a trace like this:
⇒
>>>>>>> Running install.sh <<<<<<
This is a sign that the S2I building process has detected our script to prepare the image as desired. We already talked about the install.sh script above in this chapter. Remember that S2I assemble script will look for an environment variable CUSTOM_INSTALL_DIRECTORIES which in its turn points to the extensions folder where we have an install.sh which sets drivers, and copies all the needed files to run kitchensink.
Checking the Application
After the building process has finished the image is pushed and the DeploymentConfig object is updated accordingly to use the new image. If you go the Topology view you should see this.
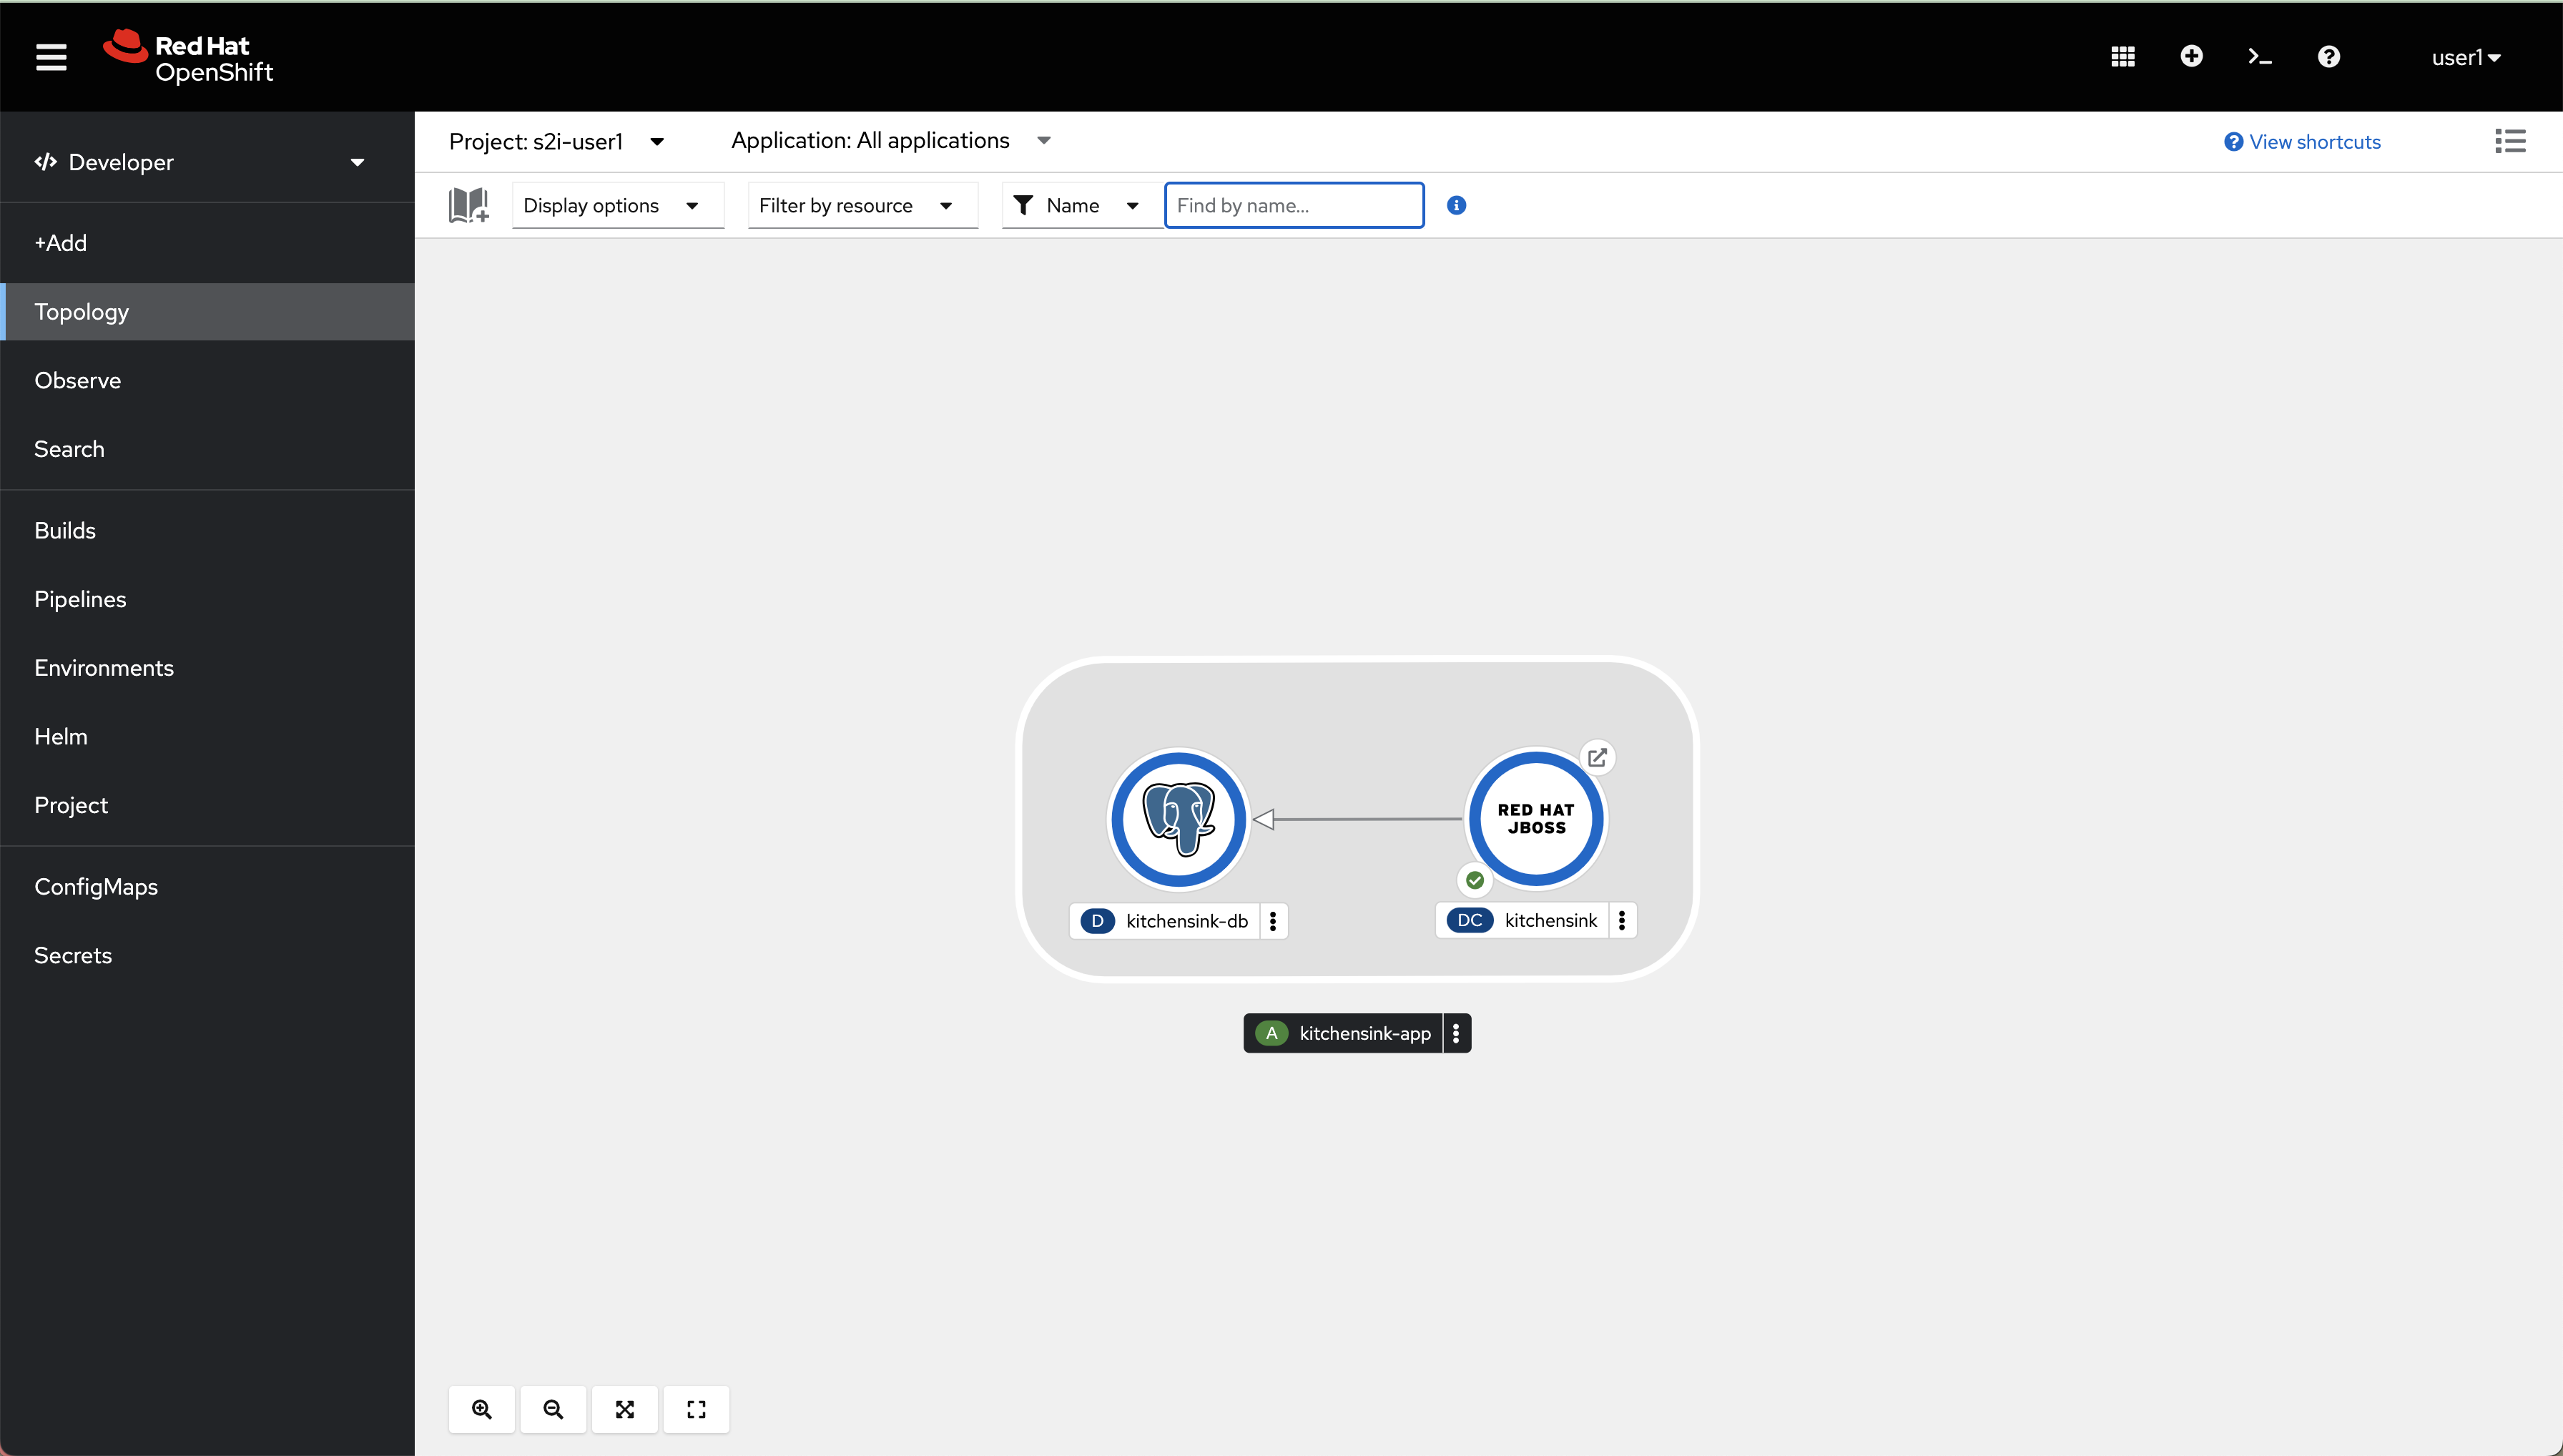
You have seen in the traces while building the container image that the assemble scripts is executed and in its turn runs our install.sh script. Now let’s have a look at the traces of the image while running. In this case it is the run script which is executed and if everything worked as expected out postconfigure.sh script should have been run before JBoss actually runs.
Run this command to have a look at the pod logs to find the expected trace including postconfigure.sh.
oc logs dc/kitchensink -n s2i-%USERNAME% | grep -A5 -B5 -e "postconfigure.sh"Time to check if our application works as expected. Go back to the Topology View.
https://console-openshift-console.apps.%BASE_SUBDOMAIN%/topology/ns/s2i-%USERNAME%?view=graphNow, please click on the route icon.
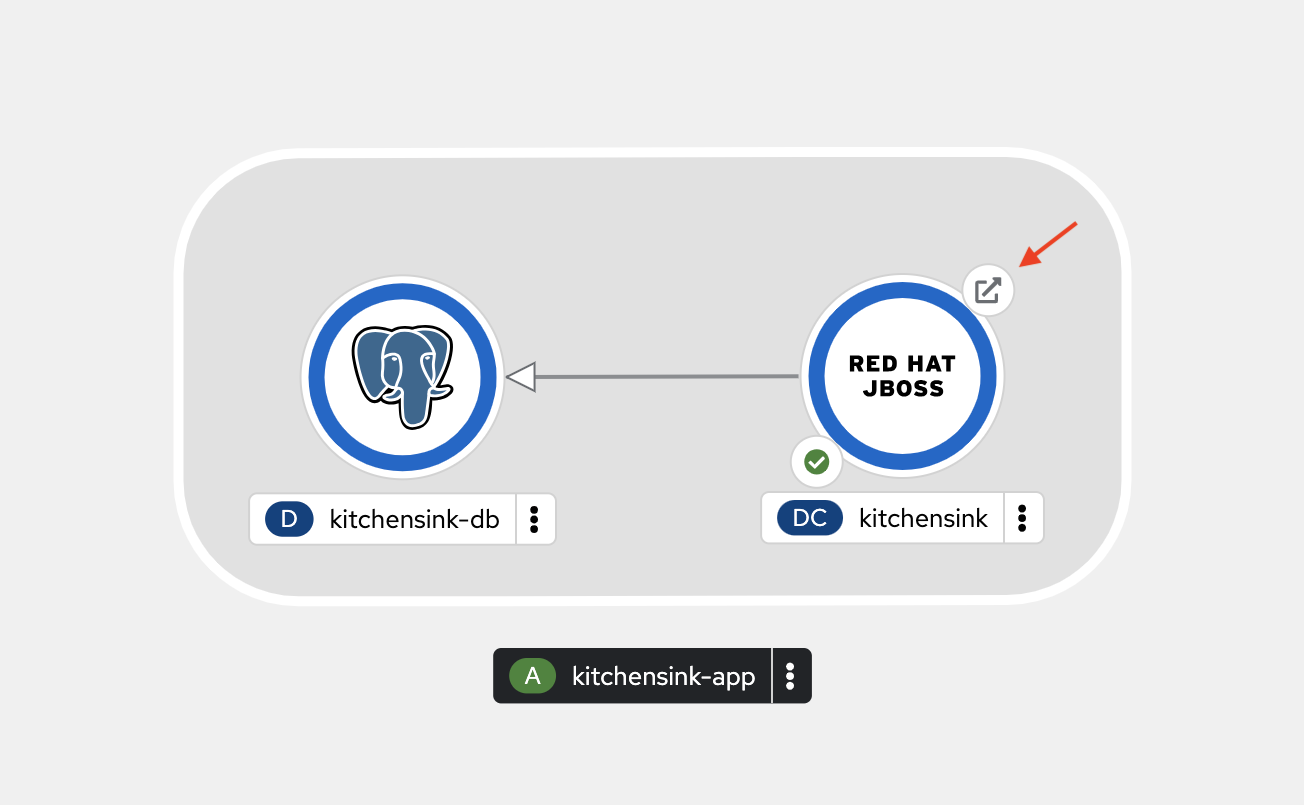
You should see something like this.
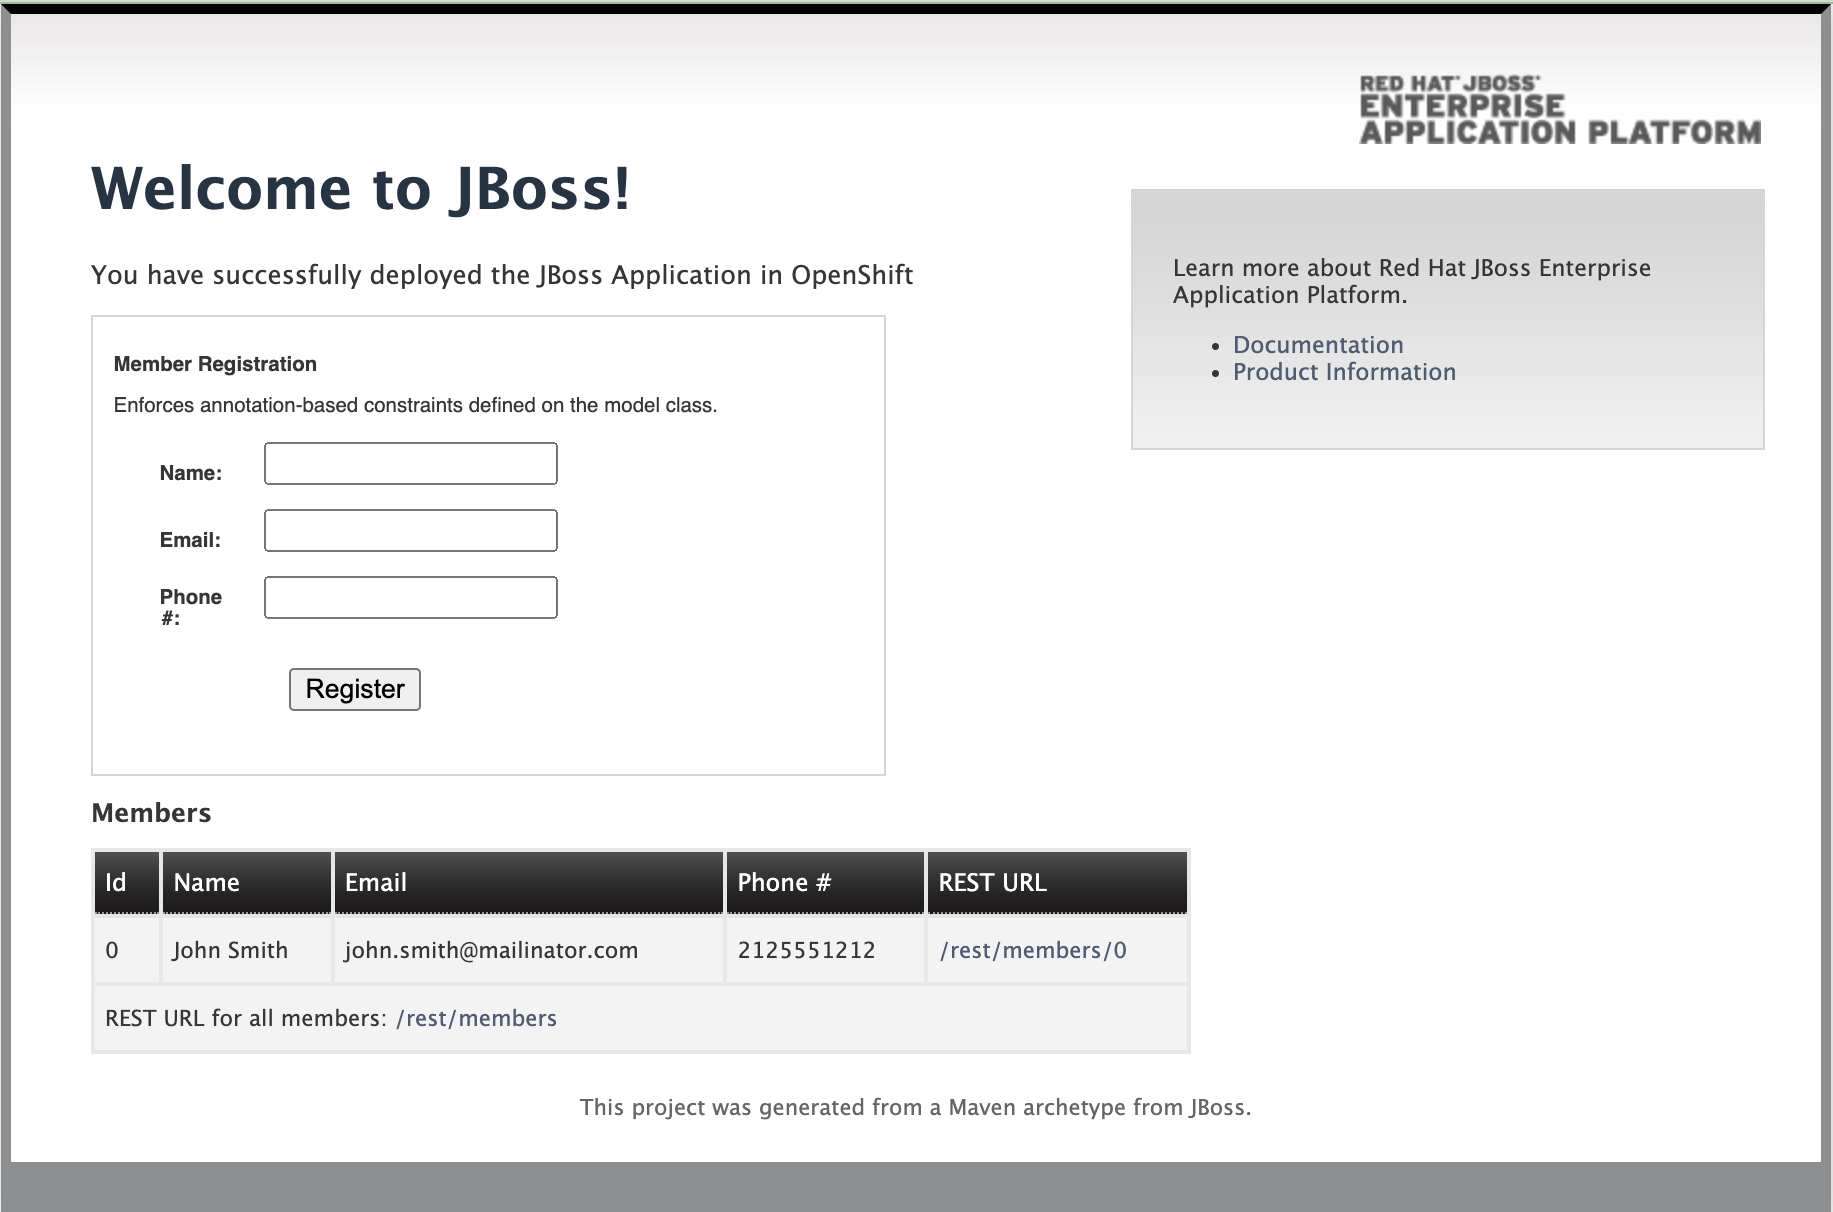
Hot redeploying a JBOSS EAP application
|
You have to wait until the application has been deployed, in the previous item, in order to redeploy it! |
Let’s explore a quick way to test minor changes in our application. In this case you will package your JBoss EAP application locally and later you will use oc cp to copy the WAR file directly to the deployment folder of JBoss EAP already running in OCP.
|
Use this way of deployment only in a development environment, NEVER in productive environments. |
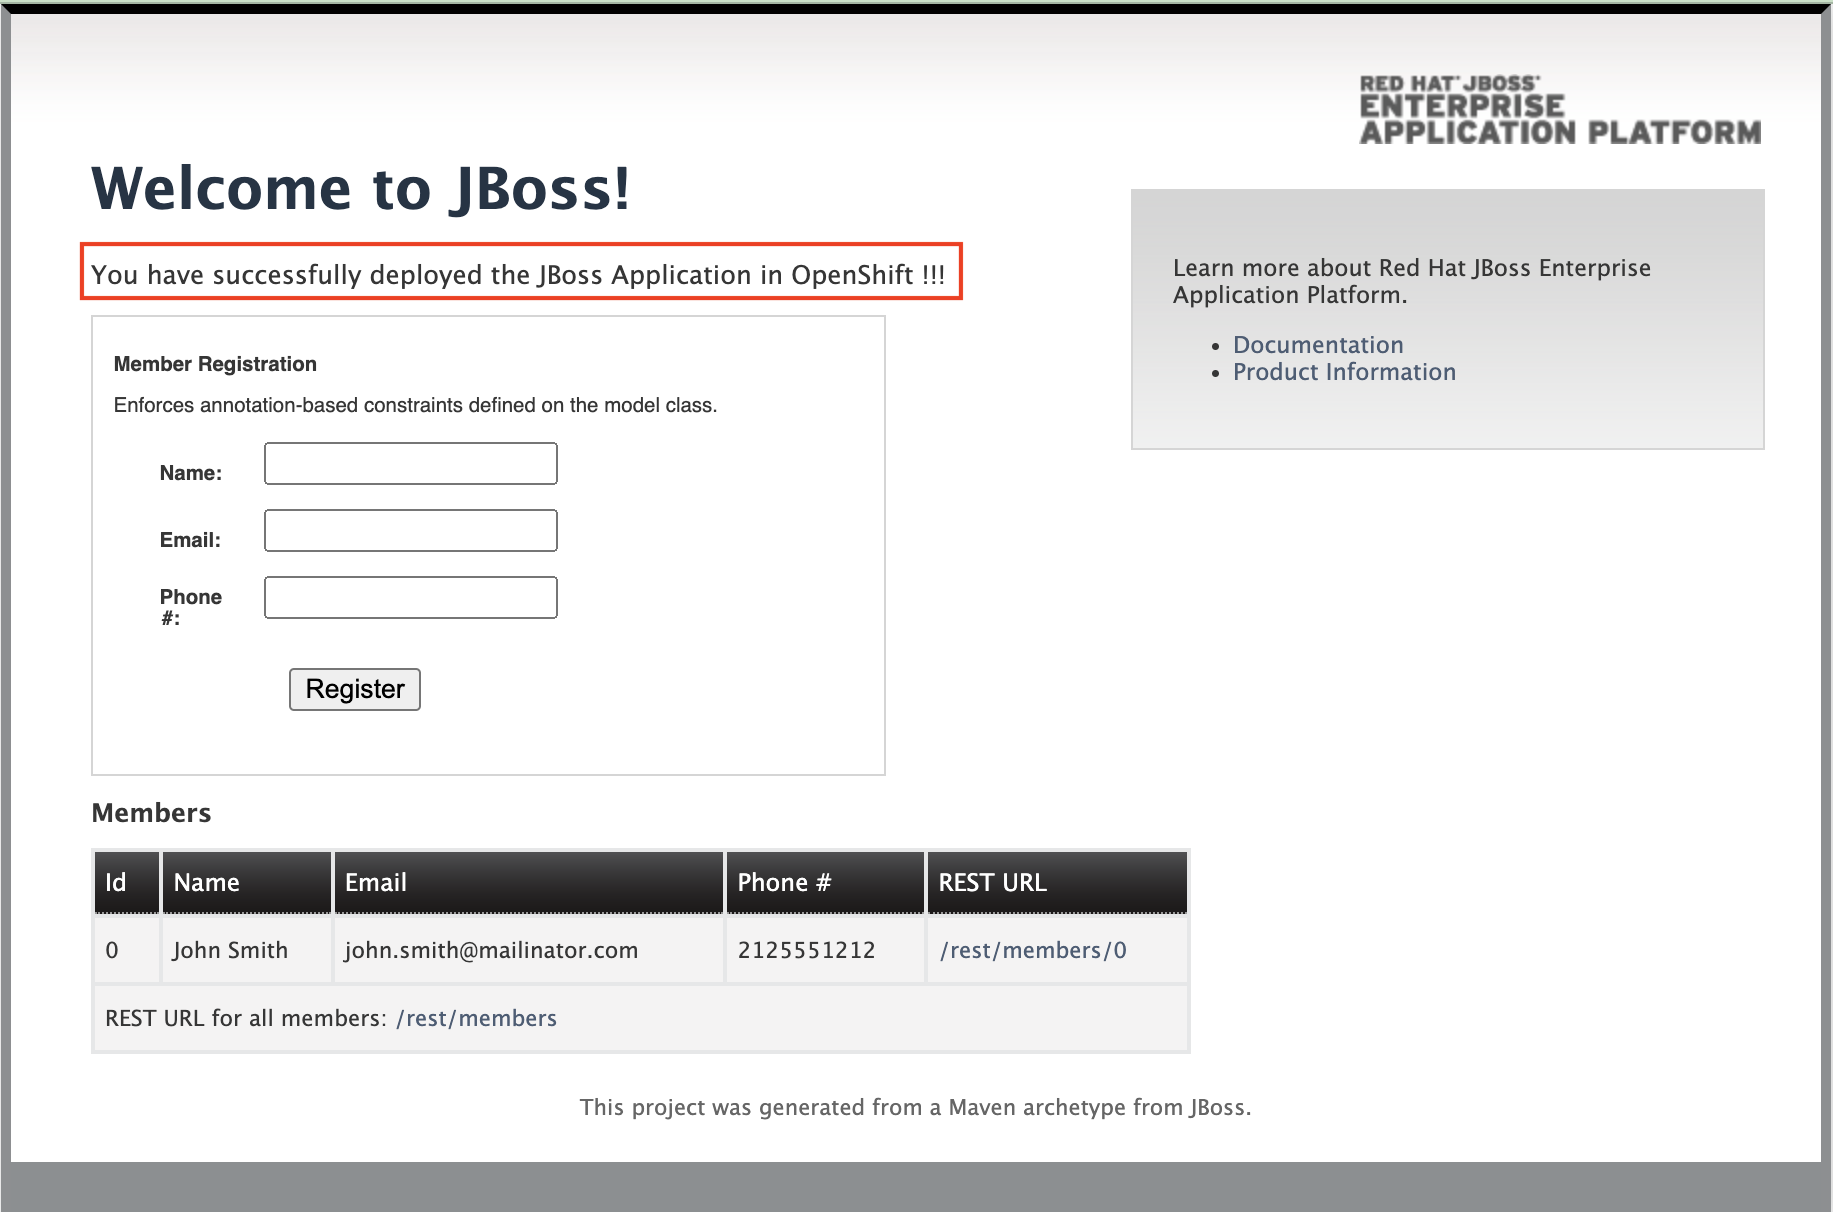
Let’s make a change in our application, open file $TUTORIAL_HOME/src/main/webapp/index.xhtml (the Kitchensink code repo) and go to line 27 approx. and make a change. For instance change this:
<div>
    <p>You have successfully deployed the JBoss Application in OpenShift</p>
</div>
With:
<div>
    <p>You have successfully deployed the JBoss Application in OpenShift !!!</p>
</div
Then please, run these commands:
oc project s2i-%USERNAME%

POD_NAME=$(oc get pod -l application=kitchensink -o json | jq -r .items[0].metadata.name)
echo "POD_NAME=${POD_NAME}"

mvn package -Popenshift
Finally let’s replace ROOT.war inside the pod we just located:
|
|
oc cp ./target/ROOT.war ${POD_NAME}:/deployments/ROOT.warOpen this link to check if the change is already applied.
|
Take into account that for a short period of time the app is being replaced and you could get a 404 error if you’re quick enough. |
https://kitchensink-s2i-%USERNAME%.apps.%BASE_SUBDOMAIN%/index.jsfYou should see something like this:
